
Description:
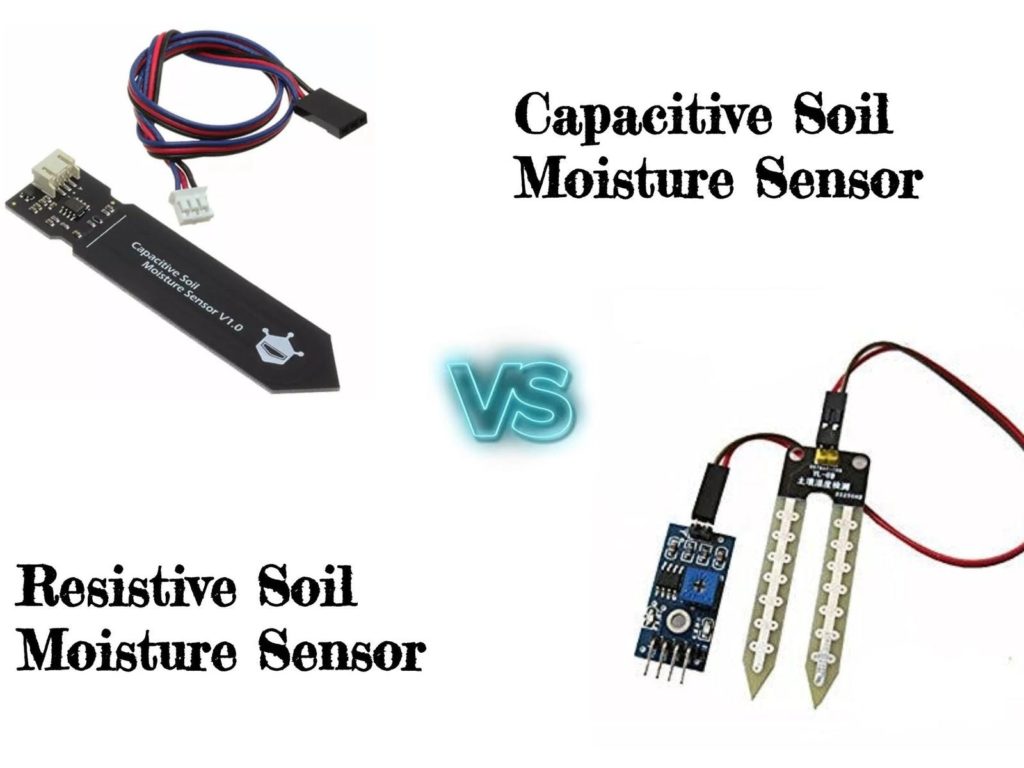
Now We are learning about, what is Capacitive Soil Moisture Sensor and how we can interface with Arduino and get the moisture levels of different soil types, Before That, We need to understand What is a capacitive and resistive soil moisture sensor, and why we use Capacitive rather than Resistive, that is explained below
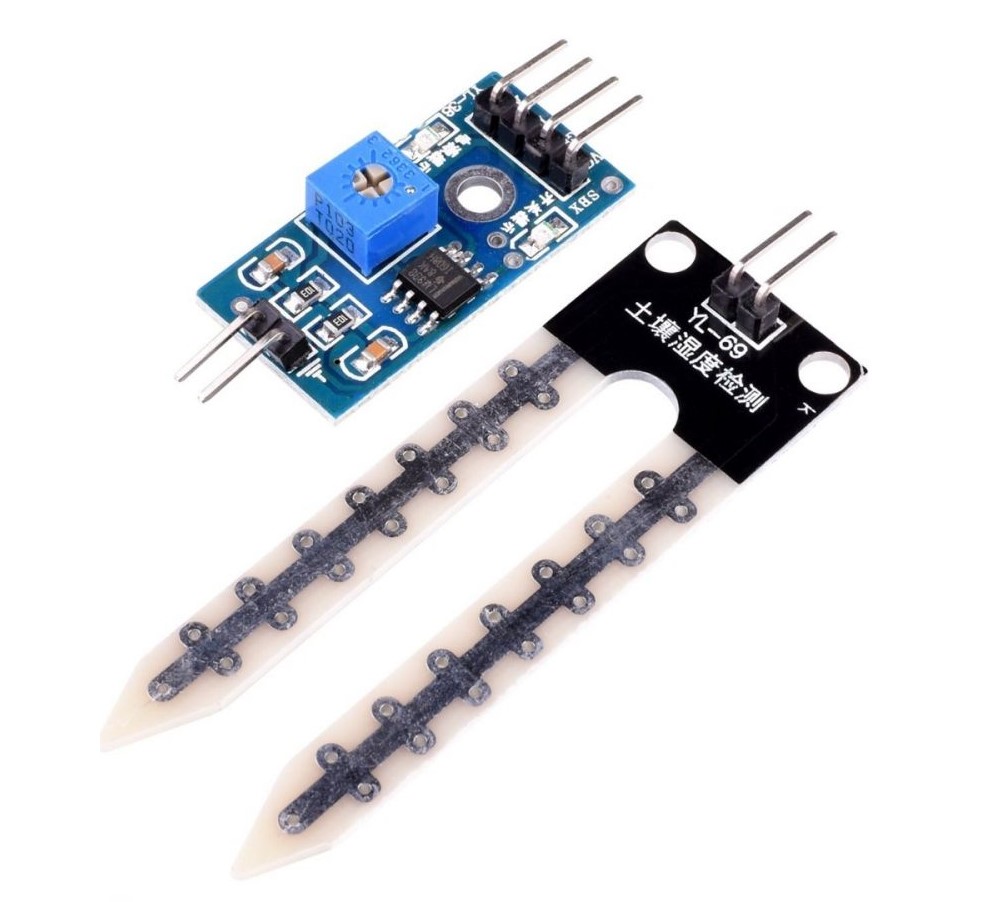
Resistive Soil Moisture sensor:
The sensor consists of two probes that are used to measure the volumetric content of water. The two probes allow the current to pass through the soil and then it gets the resistance value to measure the moisture value. When there is more water, the soil will conduct more electricity which means that there will be less resistance. Therefore, the moisture level will be higher. Dry soil conducts electricity poorly, so when there will be less water, then the soil will conduct less electricity which means that there will be more resistance. Therefore, the moisture level will be lower

Capacitive Soil Moisture sensor:
Our soil moisture sensor measures soil moisture levels by capacitive sensing rather than resistive sensing like other sensors on the market. It is made of corrosion-resistant material which gives it excellent service life

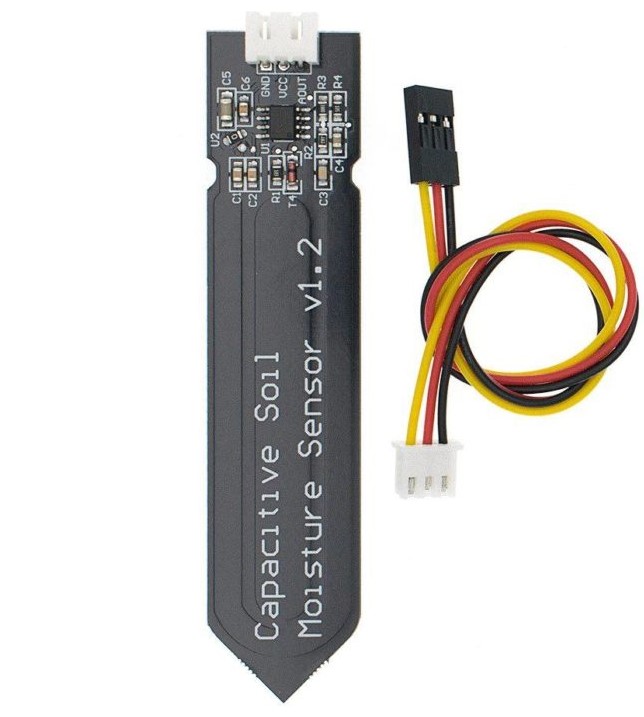
Insert it into the soil around your plants and impress your friends with real-time soil moisture data! This module includes an onboard voltage regulator which gives it an operating voltage range of 3.3 ~ 5.5V. It is perfect for low-voltage MCUs, both 3.3V, and 5V.
So we learning About both types of sensors, now we are talking about why we using this Capacitive type instead of Resistive. The major issue with the resistive soil moisture sensor is the corrosion of the sensor probes, not just because it is in contact with the soil but also because there is a DC current flowing which causes electrolysis of the sensors.

Capacitive measuring has some advantages, It not only avoids corrosion of the probe but also gives a better reading of the moisture content of the soil as opposed to resistance measuring
In reality, it does not measure moisture (as water is a bad conductor of current), instead, it measures the ions that are dissolved in the moisture i.e Adding fertilizer, for instance, will decrease the resistance of the soil, even though no water is added. Capacitive measuring basically measures the dielectric that is formed by the soil and the water is the most important factor that forms that dielectric.
Specification
- Operating Voltage: 3.3 ~ 5.5 VDC.
- Operating Current: 5mA.
- Interface: PH2.54-3P.
- Dimensions mm(LxWxH): 98 x 23 x 4.
- Supports 3-Pin Gravity Sensor interface
- Analog output.
- Weight (gm): 15.
Board Overview

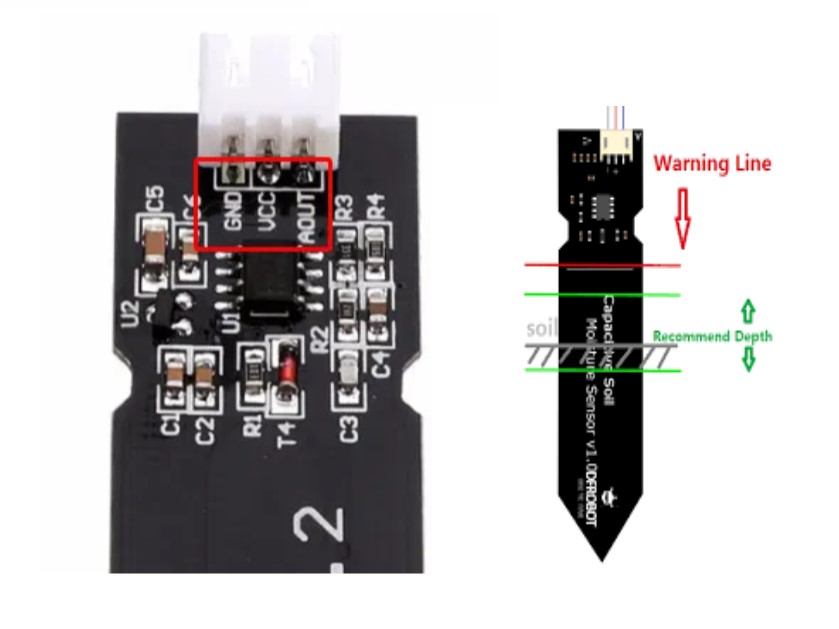
| Num | Label | Description |
| 1 | Gnd | Power GND (0V) |
| 2 | Vcc | Power VCC (3.3~5.5V) |
| 3 | Aout | Analog Signal Output(0~2.3V) |
Check out our website www.probots.co.in to find all the parts for your projects! We have 2000+ Electronic Modules, Sensors, and Components for all your electronics projects.


You can purchase this Soil Moisture Sensor Capacitive V2.0 here – Buy Now
Requirements
- Hardware
- Arduino Uno
- Analog TDS Water Conductivity Sensor Waterproof Module
- Jumper wires for connection
- Soil for testing`
- Arduino IDE
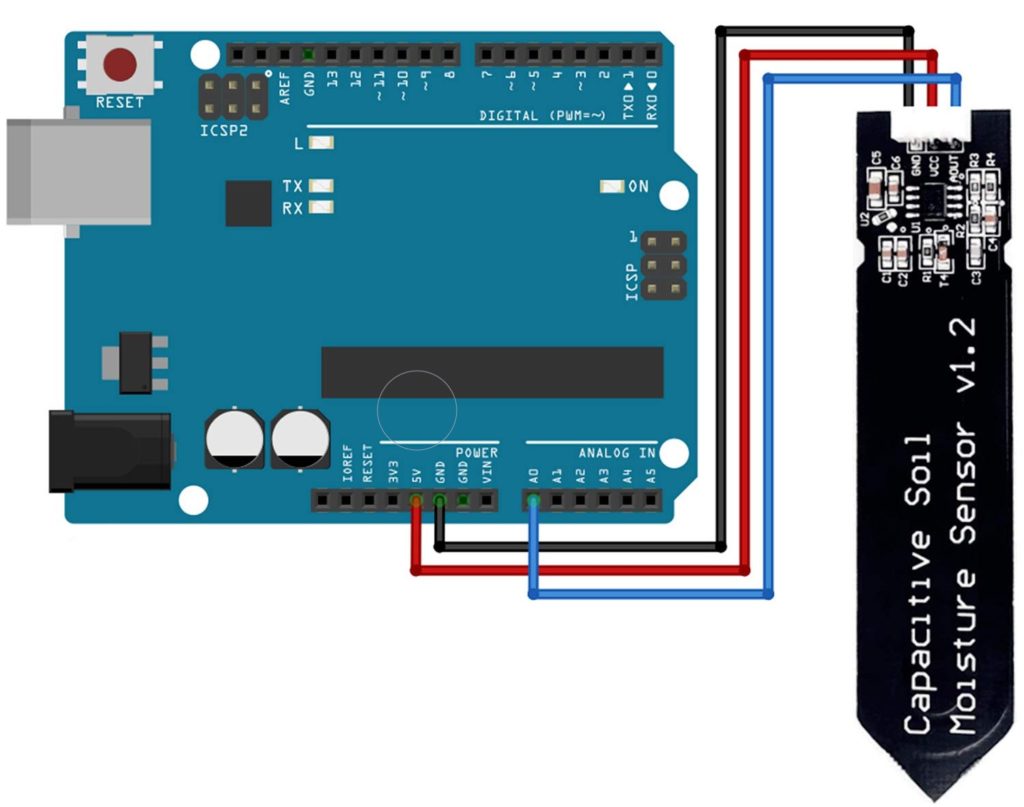
Connection Diagram

Application
- Garden plants
- Moisture detection
- Intelligent agriculture
Calibration
To get accurate readings out of your soil moisture sensor, it is recommended that you first calibrate it for the particular type of soil that you plan to monitor. Different types of soil can affect the sensor, so your sensor may be more or less sensitive depending on the type of soil you use.
Calibration Code
Void setup()
{
    Serial.begin(9600);    // open Serial Monitor and set baud rate
}

Void loop()
{
 In val;
val=analogRead(0);     // sensor Aout pin connected to A0 pin of Ardiuno
Serial.println(val);        // print the value in serial monitor
delay(100);
}
Calibration Range

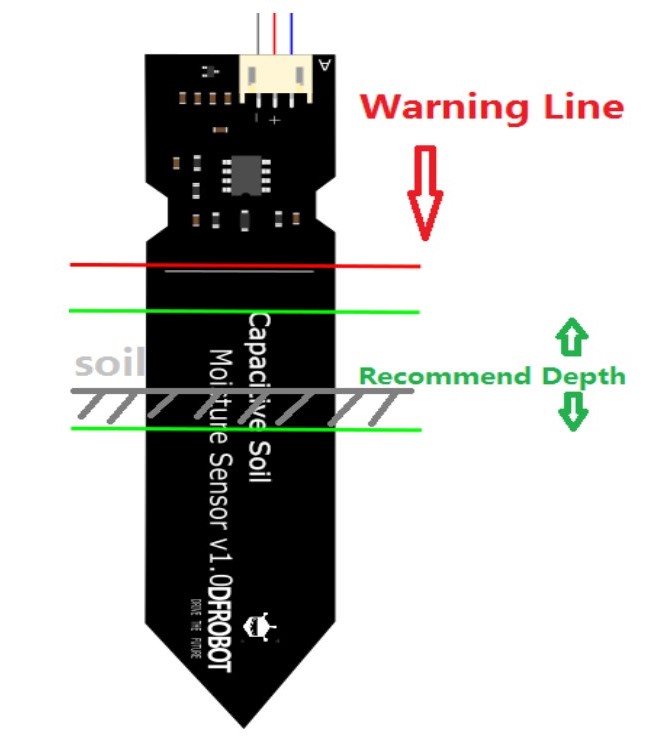
Note: Components on these boards are not Waterproof do not expose to moisture further than the red line
Section Settings
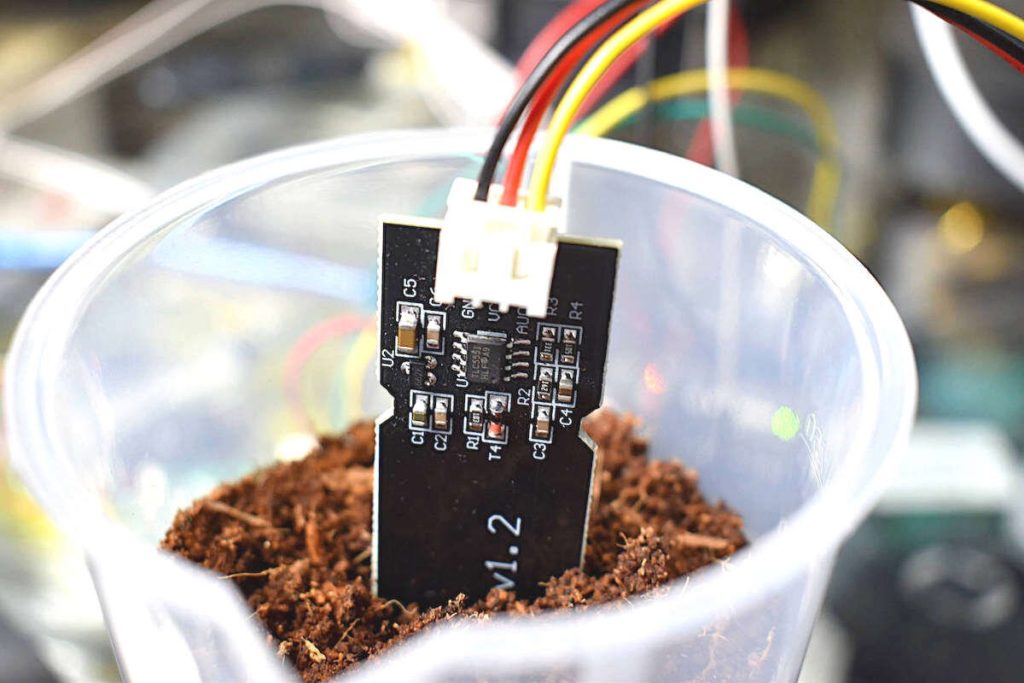
The final output value is affected by probe insertion depth and how tight the soil packed around it is. We regard “value_1” as dry soil and “value_2” as soaked soil. This is the sensor detection range. For example: Value_1 = 520; Value_2 = 260. The range will be divided into three sections: dry, wet, water. Their related values are:
- Dry: (520 430]
- Wet: (430 350]
- Water: (350 260]

Arduino code for Test
const int AirValue = 520;   //you need to replace this value with Value_1
const int WaterValue = 260;  //you need to replace this value with Value_2
int intervals = (AirValue - WaterValue)/3;
int soilMoistureValue = 0;
void setup()
 {
  Serial.begin(9600); // open serial port, set the baud rate to 9600 bps
 }
void loop()
 {
soilMoistureValue = analogRead(A0);  //put Sensor insert into soil
if(soilMoistureValue > WaterValue && soilMoistureValue < (WaterValue + intervals))
{
  Serial.println("Very Wet");
}
else if(soilMoistureValue > (WaterValue + intervals) && soilMoistureValue < (AirValue - intervals))
{
  Serial.println("Wet");
}
else if(soilMoistureValue < AirValue && soilMoistureValue > (AirValue - intervals))
{
  Serial.println("Dry");
}
delay(100);
}
All the components used in this article are readily available on our website. And also other interesting electronic components are there, Please visit www.probots.co.in and also you can place it online, we can deliver it. images only for reference