
In this article, we will be interfacing HC-SR501 PIR Motion Sensor with ESP32 WiFi Board to create a burglar alarm. The ESP32 will monitor the PIR Motion Sensor and send a notification to a phone when the sensor is triggered. You can place this alarm in a room and get a notification on your phone whenever there is movement in the room.
So what is this PIR Motion Sensor HC SR501 ??
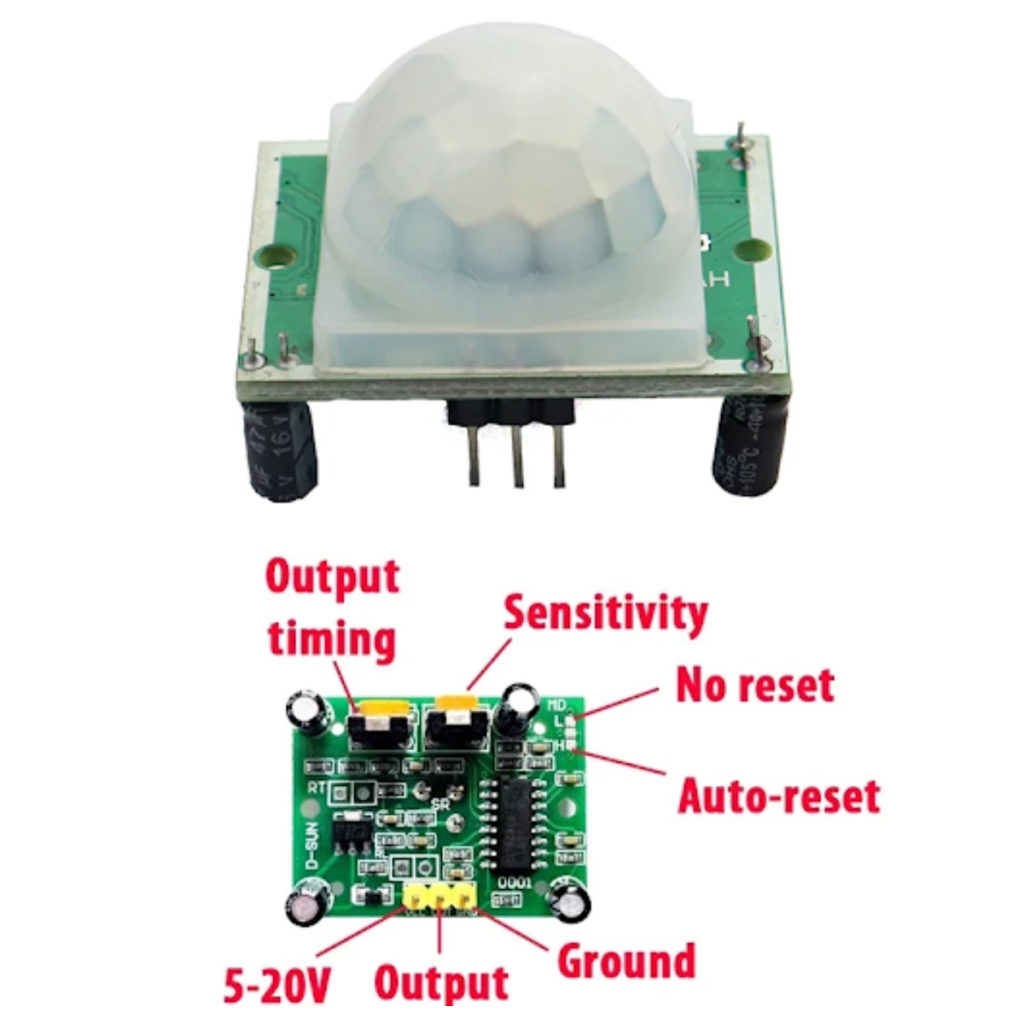
The PIR Motion Sensor Detector Module HC SR501 allows you to sense motion. It is almost always used to detect the motion of a human body within the sensor’s range. It is often referred to using “PIR”, “Pyroelectric”, “Passive Infrared” and “IR Motion” sensors.
The module has an onboard pyroelectric sensor, conditioning circuitry, and a dome-shaped Fresnel lens. It has a delay time adjustment Potentiometer and sensitivity adjustment potentiometer. This sensor is compatible with ARDUINO, RASPBERRY PI, AVR, PIC, 8051, etc.
Now let us discuss a few features of this motion sensor,
1. Infrared Sensor with Control Circuit Board
2. The Sensitivity and Holding Time are adjustable.
3.Blockade time: 2.5s (Default)
4. Sensitive Setting: Turn to Right, Distance Increases (About 7M); Turn to Left, Distance Reduce (About 3M)
5. Time Setting: Turn to Right, Time Increases (About 200S); Turn to Left, Time Reduce (About 5S).
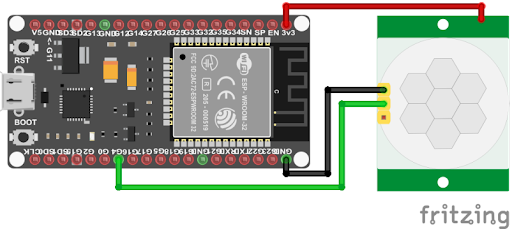
Wiring Diagram:
Code:
#include <WiFi.h>
#define BLYNK_PRINT Serial
#include <BlynkSimpleEsp32.h>
char auth[] = "";  /*Enter authenticated key from the mail */

/* WiFi credentials */
char ssid[] = "";
char pass[] = "";

/* HC-SR501 Motion Detector */
#define pirPin 32               // Input for HC-S501
int pirValue = 0;

bool movementDetected = false;

void setup()
{
   Serial.begin(115200);
   delay(10);
   Serial.println("Start program");
   WiFi.begin(ssid, pass);
   int wifi_ctr = 0;
   while (WiFi.status() != WL_CONNECTED)
 {
    delay(500);
    Serial.print(".");
 }

   Serial.println("WiFi connected");
   Blynk.begin(auth, ssid, pass);
   pinMode(pirPin, INPUT);
}

void loop()
{
   Blynk.run();
   Serial.println("Motion detected");
   Blynk.notify("Motion detected");

   delay(1000);
   Blynk.run();

   while(digitalRead(pirPin) == HIGH)
   Serial.println("Waiting for Pin to Go Low");

   Serial.println("Going to sleep");
   esp_sleep_enable_ext0_wakeup(GPIO_NUM_32,1);
   esp_deep_sleep_start();
}
Setting up BLYNK
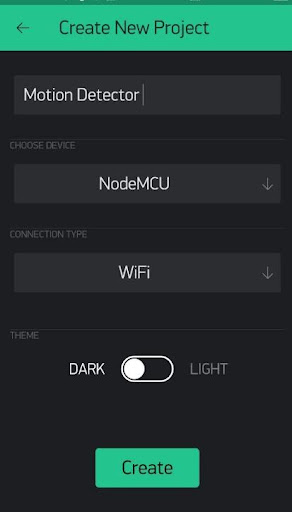
1. Create a new project and give it the name Motion Detector and then Select device “NodeMCU”.
2. Add widget “Notification” to get notification of motion detection.
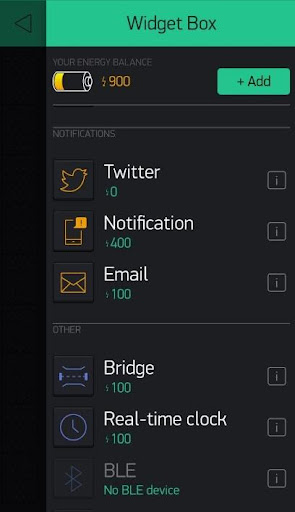
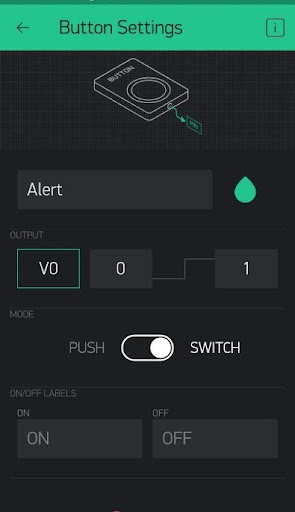
3. As the Motion Detector sends data continuously, the user will receive Blynk notifications multiple times. So, to avoid repeatedly receiving notifications The user can add an alert button. When we set this button HIGH, a message is displayed by Blynk.
4. After uploading the code from Arduino IDE, press the play button on the Blynk app for the result.
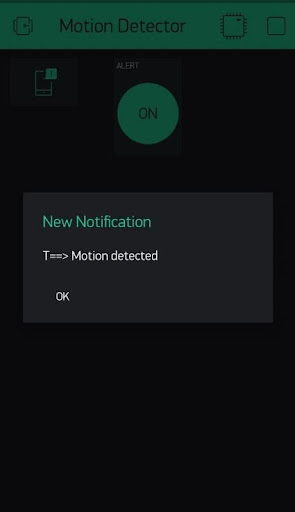
To sum it up, When the user presses the button on the Blynk app, the smartphone connected starts getting notifications from the motion sensor. When the user wants to control these notifications, press the alert button again on the Blynk app.