NEO-M8N Module Description
The NEO-M8 modules utilize concurrent reception of up to three GNSS systems (GPS/Galileo together with BeiDou or GLONASS), it recognizes multiple constellations simultaneously and provides outstanding positioning with good accuracy. For even better and faster positioning improvement, The NEO-M8 series also supports message integrity protection, geofencing, and spoofing detection.

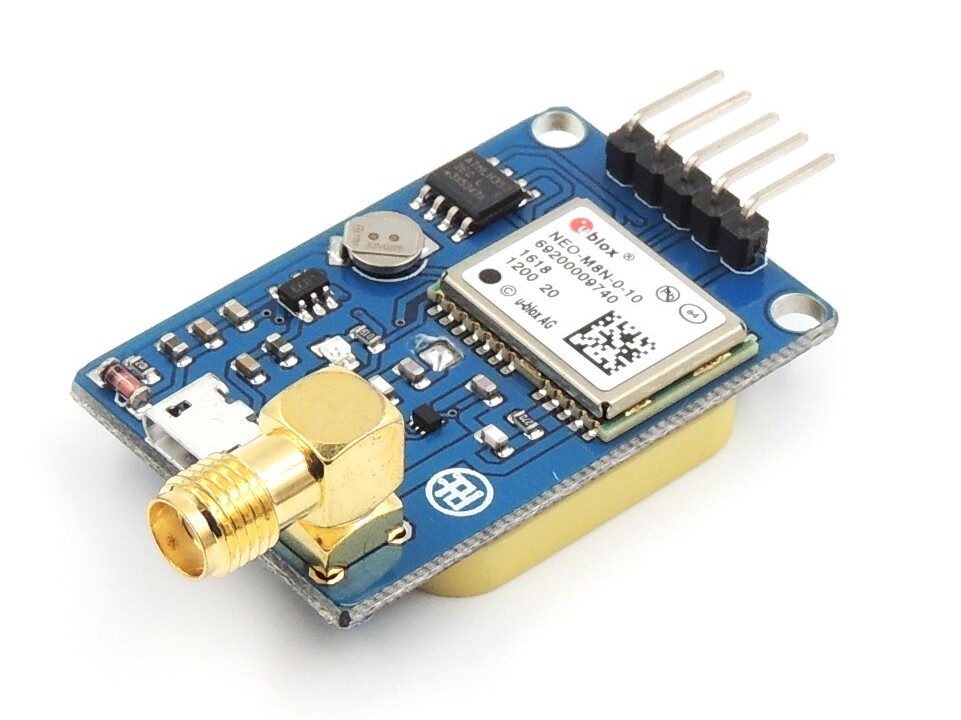
NEO-M8 pinout

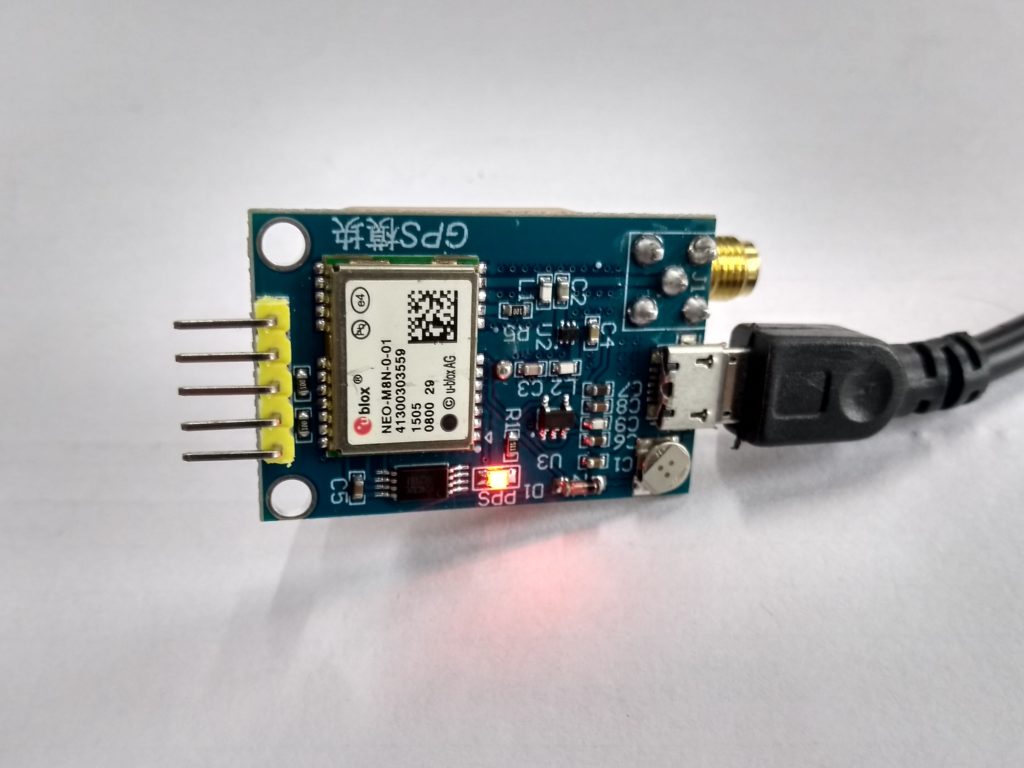
- VCC supplies power for the module. The board has a vcc pin and along with USB also.
- GND is the Ground Pin and needs to be connected to the GND pin on the Arduino.
- TxD (Transmitter) pin is used for serial communication.
- RxD (Receiver) pin is used for serial communication
- PPS (Pulse Per Second)
- USB use for Serial COmmunication and also any firmware needed to update we can use this USB.
- This module has on board ceramic Antenna and also it has SMA interface.
To Buy NEO-M8N and NE0-6M module available on our Website https://www.probots.co.in/
Now we are learning how to use NEO-m8 with U-blox, before that we need to know what is UBLOx, and its configuration. These are all explained below.
Check out our website www.probots.co.in to find all the parts for your projects! We have 2000+ Electronic Modules, Sensors, and Components for all your electronics projects.


You can purchase this NEO-M8N here – Buy Now
What is the U-center???
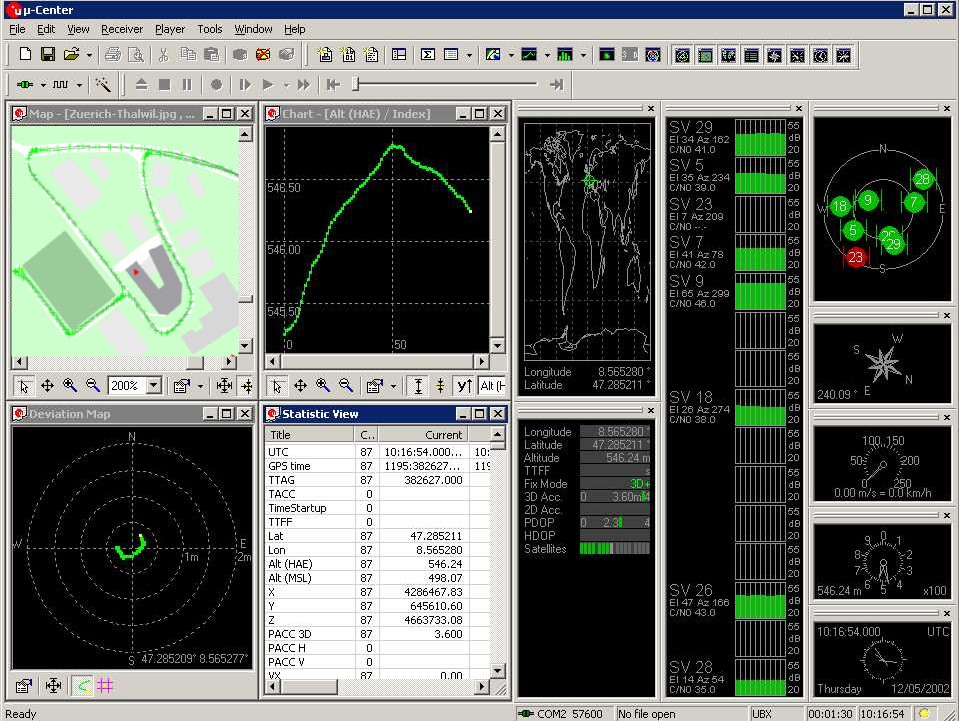
U-center from u-blox is a free software tool for configuring u-Blox GPS receivers under Windows. U-center is a dense program with many interface elements.

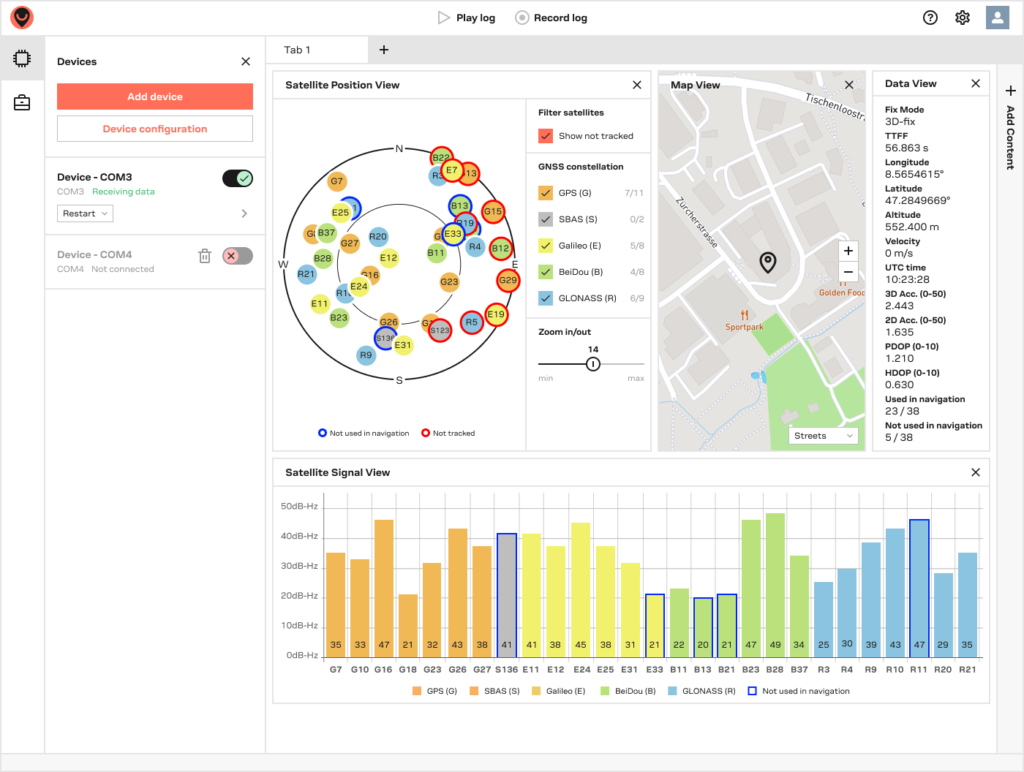
u-center is u-blox’s powerful GNSS evaluation and visualization tool. This user guide provides a description of the features of this software. It allows end-users to assess and test u-blox GNSS positioning chips and modules for navigation and positioning performance.

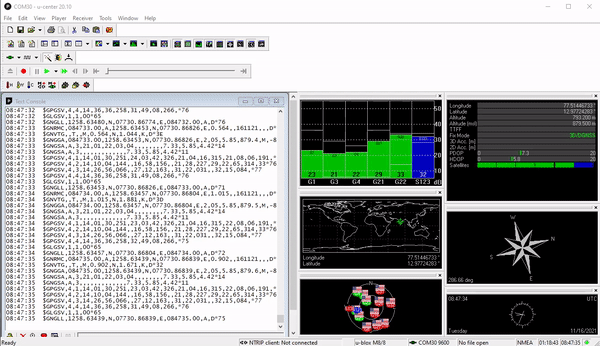
How to connect the GPS module to the U-center???
Step 1:New Version Download the U-center Software from this link.
Lower Version: Download the U-center Software from this link.
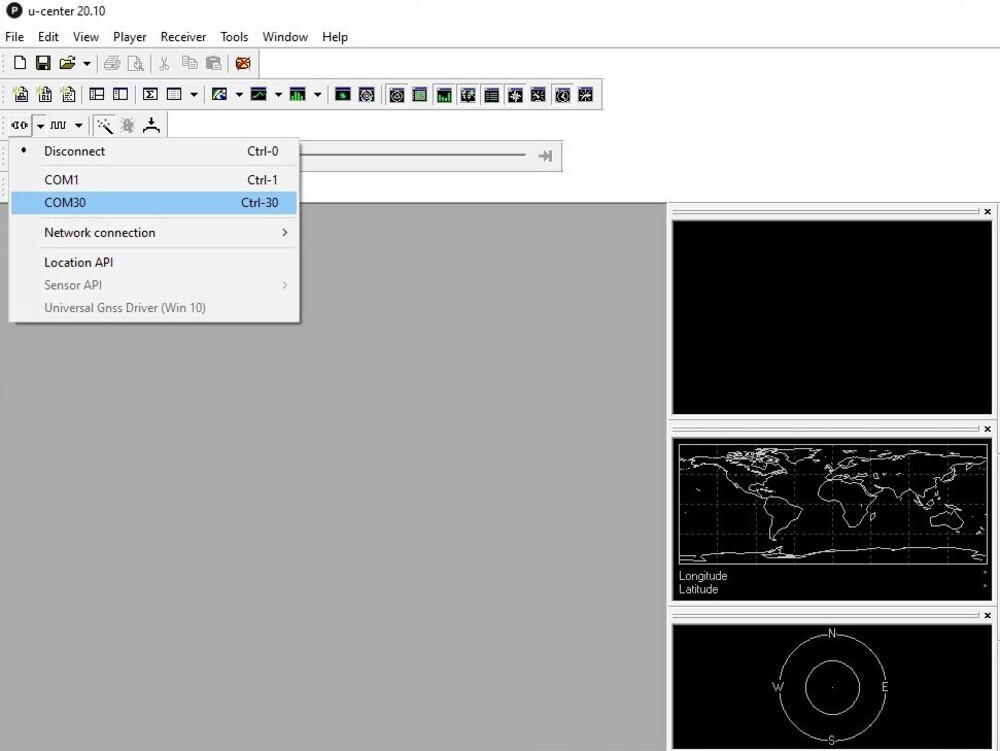
Step 2: Connect the NEO-M8 Module to the Laptop/PC via USB.

Step 3: Open the U-center Software and drop down the port list. Select the COM port that is connected to your GPS module.

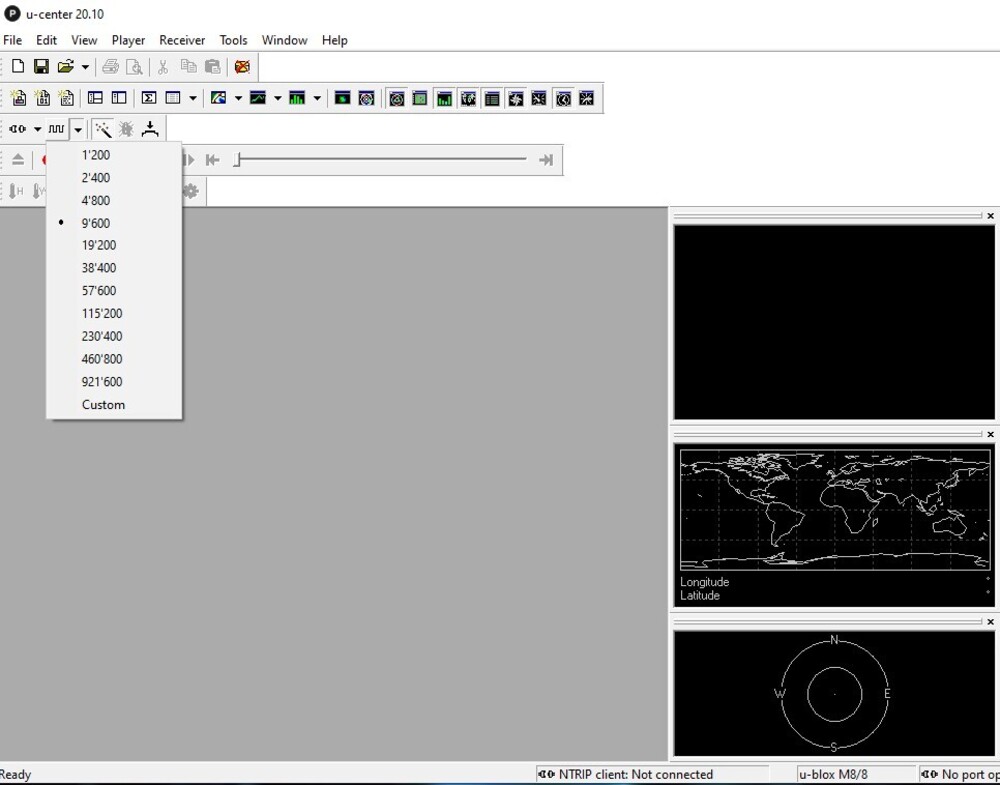
Step 4: Now select the required baud rate for the GPS module.

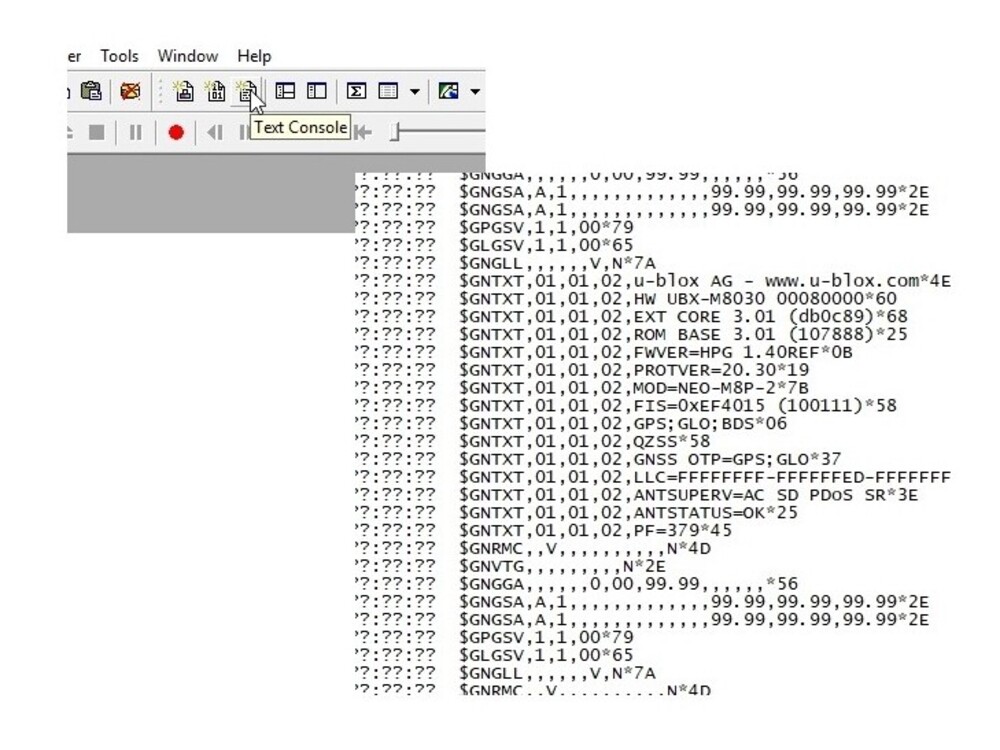
Step 5: Click on the text console button will show you the raw NMEA sentences. This is handy for quickly inspecting the visible ASCII coming from the module over USB.
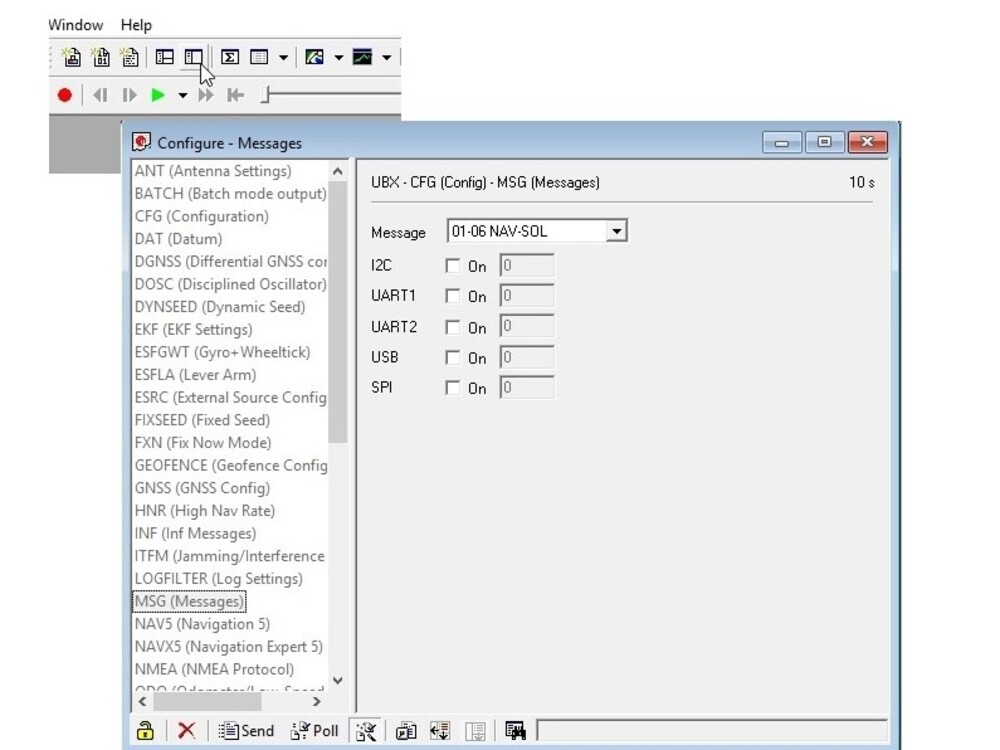
Step 6: For configuring settings and sending messages configuration button opens the most powerful window. From this window, you can inspect and configure new settings. It’s not visible but when you click on a setting such as ‘MSG (Messages).
- u-center will poll the module for its current state. The ‘10s’ in the corner indicates how old the displayed information is. In this case it’s been 10 seconds since this setting was last queried. Click on the ‘Poll’ button to update the information.
- Go ahead and select the F0-00 NMEA GxGGA message. As you click the dropdown menu, the software will poll the current settings. It’s a bit disorienting at first but gets better over time.
After selecting the port and baud rate, press connect, then GPS starts searching for satellite, GPS module does not blink every second it means it’s still searching for a satellite.
Note: please use suitable power supplies, and better to use outdoors or near windows.

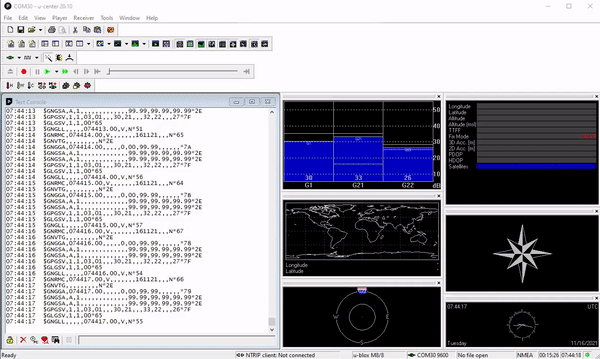
After GPS fixes the position, it starts blinking every second, and in ublox it shows the position is fixed and Longitude and Latitude values. if u need only Longitude and Lattitude, we did an article on NEO-6M interface arduino.